Last updated on July 28, 2023
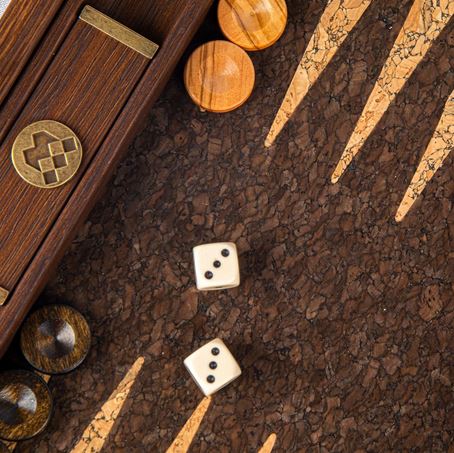
Backgammon is a great game and a lot of fun. There is the element of luck that makes the game so thrilling. Fortunes can change on a single roll and the game can ebb back and forth with the lead changing many times in a match. However, at its core, backgammon is a game of skill and strategy. Luck is fleeting, skill will win over the long run. However, backgammon bearing off strategies can help minimise the impact of luck.
Bearing off is the process of removing checkers from the backgammon board. The bearing off process can only begin once you have moved all fifteen of your checkers into your home board. The winner of the game is the first person to bear off all fifteen of their checkers. The concept is relatively easy to understand if you have broken contact and there is no chance of being hit, the game simply becomes a race. However, if your opponent still has checkers on the bar or in your home board the process becomes slightly more complicated. We will look at the general principles to apply in both of these situations.
Broken contact
Where there are no contact positions (checkers can no longer be hit), the correct way to play is to remove a checker from each of the points that correspond to the numbers rolled on the dice. For example, with a 6-3 you can remove checkers from the 6 and 3-points. If you roll a number that is greater than the highest occupied point then you must remove a checker from the next highest occupied point. For example, if you roll 6-3, but your highest occupied point is 4, you would remove a checker from the 4-point. The excess pips or wastage (2 in this instance) are lost. You can only ever bear off a single checker per die. Typically, this is two, but a double will allow you to move up to four checkers.
Contact
If your opponent still has checkers on the bar or in your home board the process becomes slightly more complicated. Hits are still possible. Your opponent will be waiting for any opportunity to hit. You need to adopt a strategy that focuses on not leaving any blots.
· Start by moving pieces off your highest points when it is safe to do so without leaving a blot. As you clear the higher points, a high roll from your opponent can force them to leap over your checkers and break contact. At this point, you should be ahead in the race and have a clear advantage.
· Try to keep an even number of checkers on your highest occupied points, this is to avoid being forced to leave a blot due to a high roll. For example, if your highest occupied point is the 5 and it has three checkers, a roll of 6-5 would force you to bear off two of those checkers. A vulnerable single blot would be left for your opponent to hit.
· If you can’t bear off any checkers then try and fill in gaps or spread out the pieces to improve distribution, but avoid leaving blots.
The next two points should be exercised with caution. Only apply these points if it avoids leaving a blot.
· Try to avoid stacking too many checkers on a single point. Because this can limit your options.
· Try not to leave any gaps between points. Because this minimises the potential for wasted pips.
Apply these bearing off strategies and you will enjoy winning more often on your Deluxe Backgammon set.
Related content
Bearing off against checkers in your home board.
Bearing off against a checker on the bar.
A complete list of Playing Guides is available on this link. Backgammon rules are available on this link.

Ran into an odd situation last night while bearing off and couldn’t locate a rule:
I have two checkers each on the six point and four point—none on the five. Other checkers on points two and three.
My opponent has two checkers on the one point.
I roll double fives:
– I can’t move the checkers on six because they are blocked by my opponent.
– I have no checkers on five
– Could I move two checkers off four? Or am I stopped because I can’t move those on the six point?
Hi Dennis,
The movement rules for bearing off are on our How to move the checkers in Backgammon page. The specific line which affected your position was: “If there is no checker on the point indicated by the roll, the player must make a legal move using a checker on a higher-numbered point”. Your checkers on the six point were blocked, therefore you had to forfeit your turn. I checked this using XG Mobile Backgammon and it was confirmed as having no legal moves. I have added your position as an example. I hope this answers your question. Thanks for commenting, Jason
When bearing off I see a lot of people make shuffling plays or gap filling plays when they could have taken a checker off. Here is a rule of thumb that’s easily applied when bearing off in backgammon. If you roll a one and you have a checker on the one point, it is ALWAYS correct to bear that checker off.
I’ve been wondering this for a while now… A typical situation when I’m inclined not to do this, if I have checkers on my 6 and 5 point, but not my 4 point.
My natural instinct is to move [at least] 1 checker onto the 4 point. If you don’t do this, then you roll a 4, or worse still, a double 4, aren’t you then wasting a lot of pips?
I’ve read your advice elsewhere so it must be good (I’m a lowly intermediate level player) but I’d like to know why you’d recommend always moving a checker off the 1 point.
Many thanks!
Hi Jonathan,
In backgammon, when you are bearing off, your priorities should be 1) not getting hit if you have your opponent’s checkers in your home board, 2) bearing off whenever possible (don’t waste pips by just spreading your pieces out if you are able to bear off, and 3) filling in gaps and spreading your pieces out if you cannot legally bear off. Thanks for taking the time to comment, Jason