Last updated on October 4, 2026
Backgammon is all about strategy, positioning, and anticipating your opponent’s moves. One important concept to master is keeping your checkers “in range.” This means ensuring your checkers are close enough to support each other, so they can work together effectively. In this Deluxe Backgammon post, we talk about the importance of keeping your checkers in range and explore why this idea is so valuable.
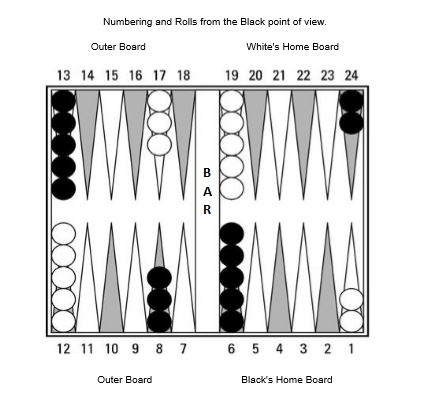
Conditions where staying in range works best
In backgammon, keeping your checkers in range means positioning your builders or attackers within 6 pips or fewer of a target blot or an open point you want to secure. Because you roll two six-sided dice, any distance from 1 to 6 can be hit or reached with a single die or a combination of two dice. Staying in range isn’t always the best tactic, but it is beneficial in these conditions:
Undeveloped positions
In backgammon, an undeveloped position is where a player’s checkers are still largely stuck in their starting configuration or haven’t progressed into a flexible formation. When your position is undeveloped, you lack flexibility. If you roll numbers that don’t allow you to safely move your back checkers, you are forced to dismantle your existing points or stack checkers awkwardly. At the start of the game, when no clear threats have emerged, keeping checkers in range helps create flexibility on subsequent rolls. Moving checkers, particularly as blots, is worthwhile and low risk.
Recirculated checkers
In backgammon, recirculated checkers occur when both players have pieces hit and sent to the bar. When they re-enter, the focus often shifts to the outer boards. As a result, players must maintain connectivity by keeping their checkers close together. This tight formation protects individual checkers from being hit again and allows them to safely form secure points.
Low threat environments
A “low-threat environment” describes a board state where you can make strategic decisions without immediate consequences from your opponent. In generally means you do not have exposed checkers within immediate hitting range (usually within 1 to 6 pips). Additionally, your opponent has few active builders or ammunition to launch an attack, or their home board is weak and open. If neither side is running a blitz or aggressively attacking, maintaining range becomes a solid strategy for managing the board.
These situations give you the breathing room to focus on positioning without worrying about immediate threats.
What does staying in range achieve?
When your checkers are in range, you gain several advantages. Keeping your checkers within range of each other allows them to work together. They can help you make new points, build a prime or block your opponent. It also reduces the chance of leaving a checker on its own where it can be hit. Think about where your checkers might be useful on your next few rolls. If checkers are spread too far apart, or concentrated in “towers”, your options can quickly become limited. Keeping them connected gives you more options and makes it easier to adapt as the game changes. It can also put your opponent in a difficult position. Controlling useful points may force them to break up their position, leave a blot or make a move they would rather avoid.
When staying in range looks… odd
Sometimes, moves to keep your checkers in range can look strange or even counterintuitive. These “mystery” moves might not seem to make sense at first glance. However, they’re often the result of a deeper understanding of positioning. Think of your checkers as islands connected by a chain of allies. That chain may seem thin or fragile, but it creates a strong network that supports your overall strategy. Good players often make these moves instinctively, relying on their experience and feel for the game.
Keeping checkers in range can sometimes feel like an abstract or philosophical idea. However, at its core, it’s a practical strategy that helps you maintain control and flexibility. The key is to recognise when this tactic fits the game’s flow and when it’s better to shift gears.
How to practice staying in range
Like any backgammon strategy, practice makes perfect. Watch experienced players and notice how they keep their checkers connected during play. Look at the moves they make and how their positioning helps them later in the game. If the game is social, then ask questions. Then try to repeat the process, doing the same in your own games. Pause and think. Always consider keeping your checkers within range when choosing a move, even if another option looks tempting. With practice, you’ll get a better feel for when this matters. It also helps to look back at your games. Were your checkers working together, or did they become too spread out? You can also practise controlling one part of the board at a time. This will help you learn how good positioning can restrict your opponent’s choices.
Summary
Staying in range is one of those backgammon strategies that feels simple on the surface but reveals its depth the more you use it. By keeping your checkers close, you create a foundation of support, coordination, and control that can adapt to almost any game scenario. It may take time to recognise when this approach is most effective, but once you do, you’ll start to see the board differently. You’ll spot opportunities to build stronger positions, force your opponent into tough spots, and gain the upper hand more often.
So, the next time you roll the dice, think about your checkers like a team. Keep them in range, and you’ll give yourself the edge you need to outmanoeuvre your opponent and win the game. Are you ready to test it out?
Related content
Direct range at Backgammon Galore.