Last updated on March 7, 2026
In backgammon, the first player, on average, does have an advantage. This has been widely known for many years and has been confirmed beyond a reasonable doubt by computerised rollouts. The best opening rolls will give the first player a small, but not an overwhelming edge. Even the least favourable rolls will give the first player a slight mathematical edge. Most of the first player’s gain comes from the advantage of early positional development by securing points and moving down builders. There is also a slight racing edge from moving first. However, in backgammon, the second player has one distinct advantage on their first turn: the ability to use doubles. In this post for beginners, we take a look at backgammon replies using doubles.
In this Deluxe Backgammon post, we take a look at the best ways to play if you are lucky enough to reply to the opening move with a double. This article assumes a basic understanding of backgammon rules, particularly how doubles work.
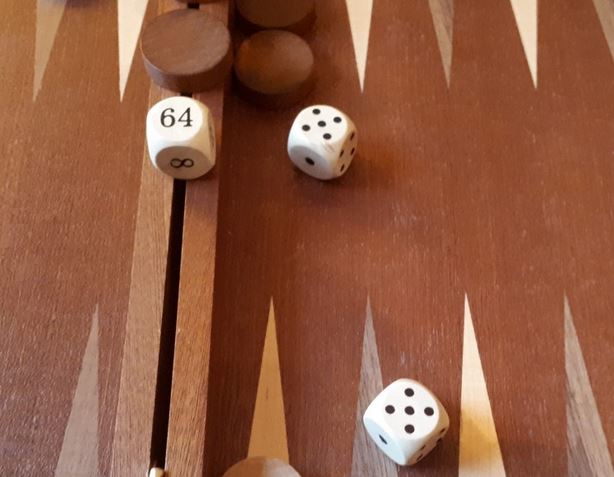
Dice rolls
In regular play, there are 36 possible combinations for the roll of two six-sided dice. If we exclude duplicate values, such as 1-5 and 5-1, then there are 21 possible combinations for each turn of play. However, in the opening moves, this is reduced to 15 possible combinations as doubles are excluded. In some ways, the opening moves are simpler because there are fewer combinations to consider. However, in this instance, we are just looking at the best way to reply using one of the six doubles rolls. Rolling large doubles early in the game gives you a huge racing advantage in backgammon. Not only do you get to take the racing lead, but you also have the opportunity to secure multiple points with a double. Another benefit of rolling doubles in the early stages of a game is being able to escape your back checkers in complete safety.

Doubles are really effective replies to the opening roll. In this post, we will look at the recommended moves for each of the doubles rolls. The focus will be on overall strategy rather than looking at every possible combination of opening moves and doubles. Understanding the strategies for each of the double rolls adds to the strength of your overall game (Backgammon strategies at The Spruce Crafts).
1-1
At first glance, the 1-1 doesn’t seem like it confers any sort of advantage. If we consider the rule of 8, it drops us half a roll in the race. However, the 1-1 allows you to secure key points on the board. If your opponent hasn’t split their back checkers, then the 1-1 allows you to secure both your 5-point and the bar-point. These are two of the three most important points on your side of the board, the other being the 4-point. Along with the 6-point, this move creates a 3-prime, which is an effective blockade. Additionally, the move unstacks the 6-point of excess material. A blot is left on the 8-point, but it is easy to re-enter early in the game if this is hit.
If the opponent has split their back checkers, leaving a blot on the 4-point, there is an additional option. Using the first half of the 1-1 roll you hit the blot and then cover it with the second half of the roll. This achieves two objectives. First, you hit, sending your opponent to the bar and forcing them to re-enter. Second, you have secured the 4-point, which is a valuable home board point which can be used to form a prime.
2-2
The 2-2 roll provides a number of options. First, you can use the first half of the roll to secure the 4-point, which is valuable as a home board point. This is particularly useful if your opponent has split their back checkers, leaving a blot on the 4-point. The second half of the move can be used to secure the 11-point. This option secures two points and potentially hits a blot (Leaving blots at The Gammon Press).
The other option is to use the 2-2 roll to advance the back checkers. If the opponent has left a blot on their 5-point, the 2-2 can hit and secure the point. This is a particularly effective move as it sends the opponent’s checker back 20 pips in the race and secures their valuable 5-point, creating an advanced anchor and a block to an effective prime.
3-3
The 3-3 conveys the usual benefits of a double, but also starts to contribute to the lead in the race. The total tally of 12 pips means that, according to the rule of 8, it adds 1 ½ rolls to your pip count. The 3-3 can be used to secure either of the bar-points and definitely should be used to cover those points if a hit can be made. Securing your opponent’s bar point escapes both of the back checkers. It also creates an advanced anchor on your opponent’s side of the board.
Securing your own bar-point has the benefit of an instant 3-prime with the 8 and 6-points. However, both of these moves are really strong if they combine, securing the point with a hit. The best move for a 3-3 if no hitting is possible is 24/21 (2), 13/10 (2). This moves your back checkers forward to form an anchor and moves secure builders from the mid-point down to the 10-point. The overall effect is to develop both sides of the board, making this the best move for a 3-3 if no hitting is possible.
4-4
The 4-4 roll, just like the 3-3, adds to your lead in the race. According to the rule of 8, it is worth two average rolls in the game. As per the 3-3 and move, that involves hitting and securing a point, should be preferred. If hitting is not possible, then there are two options to consider. Firstly, there is the 5-point, which can be reached and secured by playing 13/9 (2), 9/5(2). This has the obvious benefit of securing a key home board point. In addition, it also removes excess material from the heavily stacked mid-point (Mid-point at Backgammon Galore).
The downside of securing the 5-point is that it doesn’t leave much material on the mid-point for builders, and it does nothing for the back checkers. A strong alternative to securing the 5-point is the 24/20 (2), 13/9 (2) move. This advances your back checkers and secures an advanced anchor on your opponent’s 5-point. It also brings two builders down securely to the 9-point. If you cannot hit securely, then 24/20 (2), 13/9 (2) is statistically the best move.
5-5
The 5-5 roll delivers a big racing lead. However, it can be limited in terms of options, particularly if your opponent hasn’t split their back checkers. The back checkers on your 24-point will be blocked by the stack of checkers on the opponent’s 6-point. The reverse applies on the other side of the board. If your opponent hasn’t split their back checkers, the checkers on your 6-point will be blocked. In this case, it is best to advance the checkers from your mid-point by playing 13/8 (2), 8/3 (2) and securing your 3-point. Whilst the 3-point is not as strong as the 5 or 4-points, it is still a valuable home board point. Overall, the 5-5 roll has moved you forward 20 pips in the race (The Race at Gammon Empire).
If your opponent has split their back checkers, then any move you make should be aimed at hitting and securing a point. If your opponent’s split checkers occupy the 1 and 3-points, you will have the option of hitting both using the checkers on the 8 and 6-points. This would leave a blot on the 8-point. However, it is worth the risk, given you have hit twice and secured two home board points (Backgammon hitting at HowStuffWorks).
6-6
The 6-6 roll delivers the biggest racing lead of any roll in backgammon. It is a total of 24 pips, assuming all 4 dice can be played, which they undoubtedly can in the opening reply. Ideally, the 6-6 double roll should be used to secure both bar points on either side of the board. Although they are not home board points, they are still strong points in their own right. The bar-point on the near side of the board creates a blocking 3-prime between the 8 and 6 points. The bar-point on the far side creates an anchor on the opponent’s bar-point.
If one bar-point isn’t available, secure the other and then secure the 2-point with the 8/2 (2) play. The main advantage of the 6-6 roll is the commanding lead it will confer in the race.
Summary
Although the first player in backgammon has a distinct advantage due to the lead in the race, the second player has a chance to respond to the backgammon opening with replies using doubles. If you understand and execute the plays listed above, this is an advantage in its own right.
Related content
Read about the general principles for replies to the opening moves.

6-6 is the best reply assuming your opponent didn’t secure their bar point in the opening move. the 6-6 allows you to escape your back checkers and secure your bar point. a great way to start a game of backgammon.
“In backgammon, the first player, on average, does have an advantage. This has been widely known for many years and has been confirmed beyond reasonable doubt by computerised rollouts”
– Do you have any citations for that? I’m researching how much the first-move advantage is, but I am having difficulty finding solid numbers with citations. I’m hoping that you may have them, as you seem to have read them somewhere. The best I could find is something vague like 2-3% or a very exact 51.327% from a Quora member, but that number doesn’t seem to be repeated anywhere else (except quoting Quora.)
Hi Peter, that is a good question to which I had no answer. However, it did inspire me to write a post on the topic using the free version of XG Mobile Backgammon software. It is a fairly basic analysis, but the numbers roughly correlate to the figures you quoted. Please read the Backgammon, first player advantage post and let me know your thoughts. Thanks for commenting, Jason