Last updated on September 16, 2025
This is another post in our Deluxe Backgammon series for beginners. In our last article, we looked at bearing off against checkers in your home board. In this post, we will look at the backgammon considerations for bearing off your last two checkers. This can become very important at the end of the game if the race is close and both you and your opponent are down to a handful of checkers. This can be a thrilling way to end a backgammon game, but there are factors to consider to maximise your chance of winning. This is especially the case when the doubling cube comes into play.
Probability
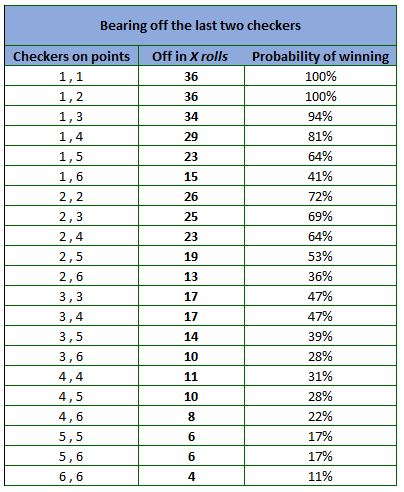
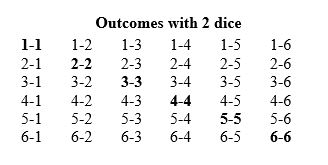
The table below shows the probability of getting the last two checkers off in a single roll, depending on where they are positioned. However, knowing where to position your last two checkers can mean the difference between winning and losing. Too many backgammon players don’t know on what points to leave their last two checkers to have the best chance of bearing off with a single dice roll (How to Calculate Backgammon Probabilities at ThoughtCo.).
Example
For example, imagine you have two checkers left, one is on your 8-point and the other on your 6-point. It is your turn, and you roll 3-4. You cannot bear-off, you can only position yourself for the next turn. Your opponent is in a similar position on the other side of the board. The game will be complete in the next couple of moves (Backgammon: Bearing Off at HowStuffWorks). What are your options?
There are three available moves. 8/1, leaving checkers on the 6 and 1-points. 8/5, 6-2, leaving checkers on the 5 and 2-points. Lastly, 8/4, 6/3, leaving the checkers on the 4 and 3-points. The last option probably looks the most balanced with the checkers in the middle of the home board. Additionally, the number required from each position still totals a roll of 7 on the dice roll. Why does it matter which position is selected? If you consult the table above it becomes clear that one position stands out from the others. The 6-1 position can only bear-off in the next turn in 15 out of 36 rolls, a total of 41%. The 4-3 position can bear-off in the next turn on 17 of 36 rolls, a total of 47%. The 5-2 position can bear-off in the next turn on 19 of 36 rolls, a total of 53%.
Winning percentage
The 5-2 position is certainly the clear winner. The 6% margin from making the correct decision would build in value over time. Many players, particularly beginners, fail to memorise these values and, as a result, miss out on opportunities to increase their winning percentage. It is also critical to understand and be able to recall this table when making doubling cube decisions (How to use a backgammon doubling cube at The Spruce Crafts).
If your opponent is certain to bear off on their next move, then to win, you must bear off the upcoming roll. The table can be used to determine if offering a double is a good move. Obviously, if your last checkers are on the first couple of points, a double is likely to be refused as you are almost certain to bear off. In contrast, if the total pip count when the total count for your two checkers is eight or more, your chance to get off in one roll is always less than 50%, and you should never double.
Related content
A complete list of Playing Guides is available on this link.
Backgammon rules are available on this link.
GammonSite, bearing off.

There are some good tips in this post. It is always challenging when trying to bring a small number of checkers into your home board and bearing them off. Knowing the correct moves is all part of the charm of backgammon.