Last updated on September 18, 2025
This Deluxe Backgammon post is another in our series for beginners. In our last post, we looked at bearing off against a checker on the bar. Today, we will look at another scenario, which is common in backgammon. Bearing off against checkers in your home board. Clearly, to arrive at this situation, there are two requirements. Firstly, you have moved all of your checkers into your home board. Otherwise, you would not be in a position to bear off. Secondly, your opponent has checkers remaining in your home board.
Back game strategy
In this situation, your opponent is likely to be well behind in the race and will adopt a back game strategy. This is a strategy designed to salvage a game when you have fallen behind. Your opponent’s goal will be to maintain two or more anchors in your home board and wait for an opportunity for a late hit. They would also try to structure their own home board so as to block your checker when it returns from the bar (Backgammon races at Backgammon Galore).
Caution
Although you are in a strong position, it is not the time to be careless or overconfident. You need to remember that although you might be in a winning position, getting hit during the bear-off can reverse the situation with a single roll of the dice. The winner is the first player to get all their checkers off is the winner, not the first to get some checkers off. Also, remember that if you are hit and have to re-enter off the bar, you cannot bear off any more checkers until they are all back in your home board.
A general rule of thumb for bearing off is to try to keep an even number of checkers on your highest occupied points. This is to avoid being forced to leave a blot due to a high dice roll. Always keep this in mind and use lower rolls to even out the highest occupied points. The key concept of bearing off is to start by moving pieces off your highest points when it is safe to do so without leaving a blot. As you clear the higher points, a high roll from your opponent can force them to leap over your checkers and break contact. At this point, you should be well ahead in the pip count and have a clear racing advantage (Backgammon bearing off at HowStuffWorks).
Example
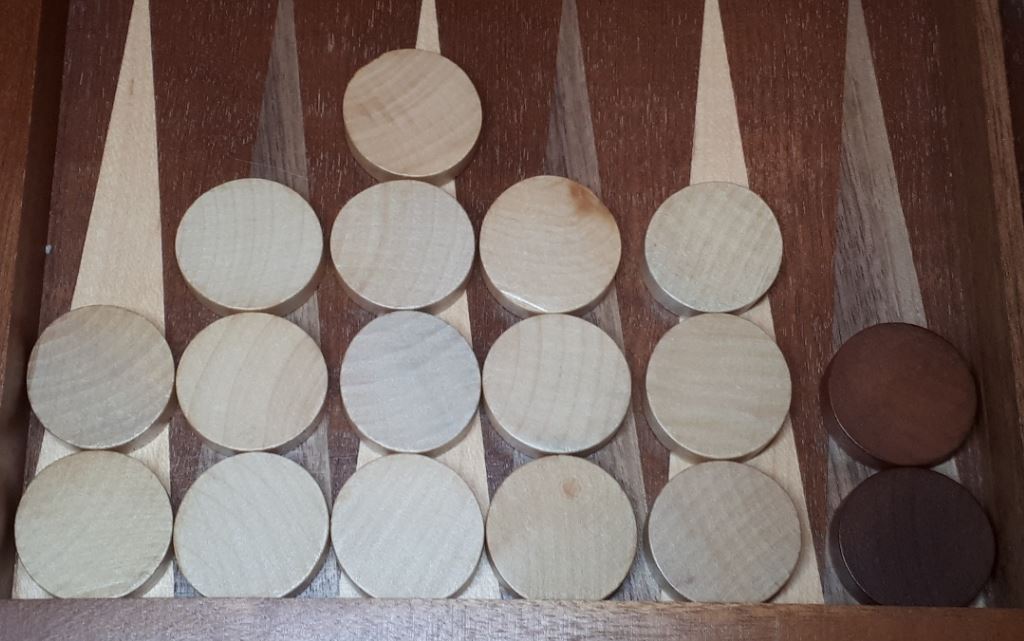
Consider the position below, which is from a game back in early March this year. In fact, it was our last live game before the coronavirus lockdown in London. White is clearly in a strong position with all of their checkers inside their home board. However, all is not lost for black as they hold an anchor on the one-point. On the other side of the board, black has all of their remaining checkers in their home board with five secure points.
High rolls
White needs to bear off on the assumption that black will hit any loose checker. With five secure points in the black home board, it could mean difficulties returning from the bar for white. What are the disaster rolls for white? A double six wouldn’t be ideal. That would force white to bear off from the five and six points, leaving a blot on the five-point. A 6 – 5 is far from ideal as well. White would be forced to bear off the six-point using the 6. The remaining checker on the six-point is unable to use the 5 because of the black anchor. The only move available is to bear off from the five-point. Again, this leaves a blot on the six-point with an opportunity for black to strike.
Lower rolls
For lower rolls, such as a 3 – 1, white has several options. Besides, bearing off from the three-point, white should consider the six-point checkers. Moving the six-point checkers clears the six-point. This would force black to break the anchor with any roll of a 5 or 6. Additionally, it leaves an even number of checkers on the five-point, which avoids the possibility of being forced to leave a blot on a high roll.
These games, where one player is forced into using a holding strategy, can be very exciting when multiple hits are exchanged. The game can see-saw back and forth with each player taking advantage multiple times. However, in this instance, black’s next roll was 6 – 6, and they were forced to break contact. A couple more doubles by black saw them victorious in a one-sided race (Holding Games & Back Games at Backgammon Galaxy).
Related content
Backgammon rules are available on this link.
The bear off process from GammonLife.
The probability of entering checkers from the bar.

I am just learning backgammon, so these are all very useful points. Previously I was wildly bearing off checkers at every opportunity and leaving lone checkers to be hit. I am now taking my time and evaluating my options carefully. It has really helped improve my backgammon. Thanks.
Hi Karly, we are pleased the article was helpful. If you want to improve your backgammon, we have pages of Beginner’s Guides. Hope you continue to enjoy your backgammon, Jason